Kool-aid cherry, strawberry and orange:

These directions are only suitable for natural animal fibers including different varieties of sheep wool, mohair, alpaca, and other animal fibers like silk. This method will not work on plant fibers like cotton, linen, bamboo and the like. Also, this method won’t work on man-made fibers like acrylic. My understanding is that these fibers only get stained using acid dye, and eventually the color will bleed and fade. If you have yarn that is a blend of fibers, the wool will get dyed and the acrylic will not. If you have an adventurous spirit, you may get some interesting results this way.
Undyed natural roving:

Kool-aid dying is pretty common and lots of tutorials already exist on the subject. If you do a google search, you will find them. I’m sharing my own experiences here dying in the microwave. Your microwave may produce different results and I’m not sure what to say about that except just do what I did, experiment a LOT. You will learn to enjoy the fragrance of wet sheep and black cherry coming from the kitchen.
Homespun beaded yarn dyed with Kool-aid lemonade, strawberry and orange:

My methods are not exact science. I told you that I’m more of an “art girl.” You must love to experiment and embrace unexpected results. This sort of dying is done in the kitchen, using kitchen tools and equipment, counters, sink and microwave. If you are using commercial dyes, DO NOT dye in your kitchen. This is strictly food-grade dying, got it? Good.
List of what you’ll need:
- gloves
- yarn or fiber
- Kool-aid (one packet per ounce of fiber)
- Microwave safe containers large enough to fit yarn or fiber
- Oven mitts
- Tongs
- Towel
- Damp sponge to wipe up messes
- Plastic wrap
- Jars to measure out dyes
- Wooden popsicle sticks for stirring
- (optional) foam brush for painting (or turkey baster)
- (optional) small reusable jars for storing unused dye mixtures
1. GLOVES: The number one rule of dying is to wear gloves. I know you think you will be careful but it doesn’t matter. Unless you want stained hands, wear gloves. I wear the big yellow gloves meant for household chores. And I wear them every time I handle the dyes. I’m sure the surgical style gloves are useful too.
2. YARN OR FIBER: As stated previously, your yarn or fiber you are dying must be an animal fiber to use this method. I don’t like to dye more than 2 ounces of fiber at a time. I have better results with smaller batches, and I’m less likely to accidently felt anything. Yarn should be in hanks, not tightly would balls or skeins. You need to make sure the dye touches all of the yarn.
3. KOOL-AID: Kool-aid is already acidic and you don’t need to add the vinegar or lemon juice, at least in my experience!
4. CONTAINERS: The containers you use can still be used for cooking since we are using food-grade dyes. I use a set of ceramic bowls in varying sizes for single color dyes. I use large ceramic or glass pie dishes for multiple colors. Use what you have on hand, so long as it can go in the microwave.
5. OVEN MITTS: You will need oven mitts or towels because the bowls will get very hot coming out of the microwave. I’m not exaggerating. USE MITTS!
6. TONGS: Tongs are useful for picking yarn up out of steaming hot water to avoid burning yourself. I also use them to poke around to check if the fiber has taken in all the dye.
7. TOWELS: Towels are important for soaking up extra water that comes out of the fiber and catching little drips and problems. I lay out a big old towel on part of my counter and consider it the “towel station.”
8. SPONGE: A damp sponge is crucial to wipe up messes. No matter how careful you are, eventually there will be a big ‘oops’ and you will be glad you had that sponge handy. Kool-aid stains, trust me.
9. PLASTIC WRAP: I strongly suggest using clear plastic wrap since the colored kind will make it very hard to determine when your dye is absorbed. I use plastic wrap to cover the bowls of dye and fiber when they go into the microwave. Also, plastic wrap is good for protecting your countertops from stains. If you are using the painting technique, you will need to lay out newspapers and plastic wrap to protect your table.
10. JARS: You will need something to measure your dye. You can use a bowl if you like but I prefer a jar or some other container that can be sealed and re-used. Often, I mix up a color and I don’t use all of it, so I just put a lid on and place it in the refrigerator. Also, sometimes I have just a little left over, so I use that as a base to experiment with mixing up new colors. The jar should be at least 8 oz and up to 16 oz for best results. I also sometimes use a big plastic beer cup to mix colors and then pour the leftovers into a small yogurt container to use later. When you see these in your refrigerator, remember that they are not filled with yogurt anymore.
11. STICKS: You need something to stir and dissolve your dye into hot water. I prefer wooden popsicle sticks. I actually use and re-use them a few times before they get too worn out.
12. BRUSH: If you are using a handpainting technique, you need a brush or turkey baster. I like the foam brushes. I also can get away with using these a few times before tossing them out.
13. CONTAINERS: Like I stated before, storing your unused dyes is a good idea if you don’t like to waste anything. It’s not just me. Most crafters are like this, right?
You should now be ready to start dying. Be sure to allow yourself enough time to complete the task without too many distractions. The more you get ready in advance, the better your results will be. Once you are in the cooking phase, you will need to stay nearby and focused.
Undyed homespun yarn:

The same yarn, dyed with Kool-aid lemonade, strawberry and orange:

Start by soaking your yarn. Fill a bowl with hot from the tap water. Use your tongs to smush all the yarn under the water but do not over-agitate. Get out the air bubbles! Once the yarn is submerged properly, don’t touch it again until you are dying. This yarn needs to soak at least 20 minutes, ideally 30. I usually get all the yarn soaking at once, then move on to prepping the dyes.
Now it’s time to mix up your dyes. You’ll want to use about one packet of Kool-aid per one ounce of fiber for vivid, intense color. It depends on the results you are looking for. Use less for pastels.
Mexican flavors of Kool-aid:

Procure a separate jar for every color of dye you intend to use. You can use as many colors as you want, it’s your project, right? Put on your gloves and empty a packet of Kool-aid in the bottom of a jar. Pour hot from the tap water over the crystals and stir with a wooden stick to dissolve. I usually pour in about 8 to 16 ounces, depending on the color and saturation I’m seeking. The amount of dye matters more than the amount of water in terms of the final results. You want less water if you are pouring or painting bold dye on a small area. You want more water if you are dying the whole hank with one color, and need to have enough water in the bowl. You never want the yarn to dry out in the microwave. This is considered a disaster.
Once you have all your dye jars ready to go, it’s time to get the dye bowls ready. If you are dying in a bowl or pie plate, get them ready on the counter in you towel station. Get the plastic wrap ready to go. I like to dye two yarns at once, because one yarn will be in the microwave while the other one is cooling. So get both bowls or dishes ready. If you are painting, lay out newspaper on your table and cover with a layer of plastic wrap. Get your brushes ready to go. Now check the clock, has it been 20 minutes yet? Good.
Homespun bulky yarn dyed with Kool-aid orange and strawberry:

With gloves, take out one hank of yarn and let it drip out into the sink. Gently wring the water out of the yarn until no more water drips out of it. You can also blot the yarn in a towel to remove excess water. For dying with one color, pour the dye into the bowl and lay the yarn into it. Use the tongs or your gloved hands to push the yarn into the dye water, making sure everything is covered. If you need to add more water, carefully pick the yarn up and add water to the bowl, then place the yarn back. To avoid accidental felting, don’t agitate, over handle, or change the temperature of the water on your yarn. Don’t ever run water directly over your yarn. Once your yarn is properly submerged, cover with plastic wrap and set aside to do your second yarn.
Yarn dyed with Kool-aid lemonade, orange, pink lemonade and strawberry:

If you are making a two or three color yarns with pooled colors, set the damp-dry yarn into an empty bowl or better yet, a glass or ceramic pie plate. Arrange the yarn so that it is in a spiral, as close to one layer as possible. Avoid bunching and tangling. Pour the colors gently over the yarn and let them pool in the bottom of the bowl. Cover in plastic wrap and set aside.
To make a handpainted yarn, lay the damp yarn on the plastic covered newspaper. Using a brush or turkey baster, paint colors onto the yarn as desired. This will take longer than you think it will, but you may like the results better. For self-striping yarn, paint sections of yarn at a time. Make sure all of the yarn has taken up some dye and it is all wet. Carefully pick up edges of plastic wrap and roll around the yarn. Set the bundle into a bowl or dish and set aside.
Roving dyed with Kool-aid lemon-lime and Wilton's copper icing gels:

Homespun coiled yarn dyed with Kool-aid grape and strawberry, and Kool-aid lemon-lime and Wilton's copper icing gels. (see roving above)

Once you have your two bowls of yarn and dye ready, it’s go time. Be sure to use your oven mitts, okay? The dye formula is as follows: microwave on high for two minutes. Remove from microwave for two minutes. Repeat until done. The reason I suggest doing two at a time is that when one is resting for two minutes, you put the other one in to cook. The timing works out well. This process usually takes 6 to 12 minutes of actual cooking time. It could take longer if you use a lot of dye. I’ve also noticed that colors with blue in them take the longest. If the yarn starts to boil, stop the microwave and let the yarn cool for at least five minutes. Boiling will felt your yarn. Overcooking will felt your yarn.
Roving dyed with Kool-aid black cherry, grape and strawberry (before spinning):

The same roving, after spinning:

Your yarn is done when the water is clear and all of the dye is absorbed into your yarn. If the water is nearly clear and you’ve gone over 12 minutes, just let the bowl sit, covered, until the dye is absorbed. This will reduce the risk of overcooking. The yarn will continue to absorb dye so long as it stays nice and hot.
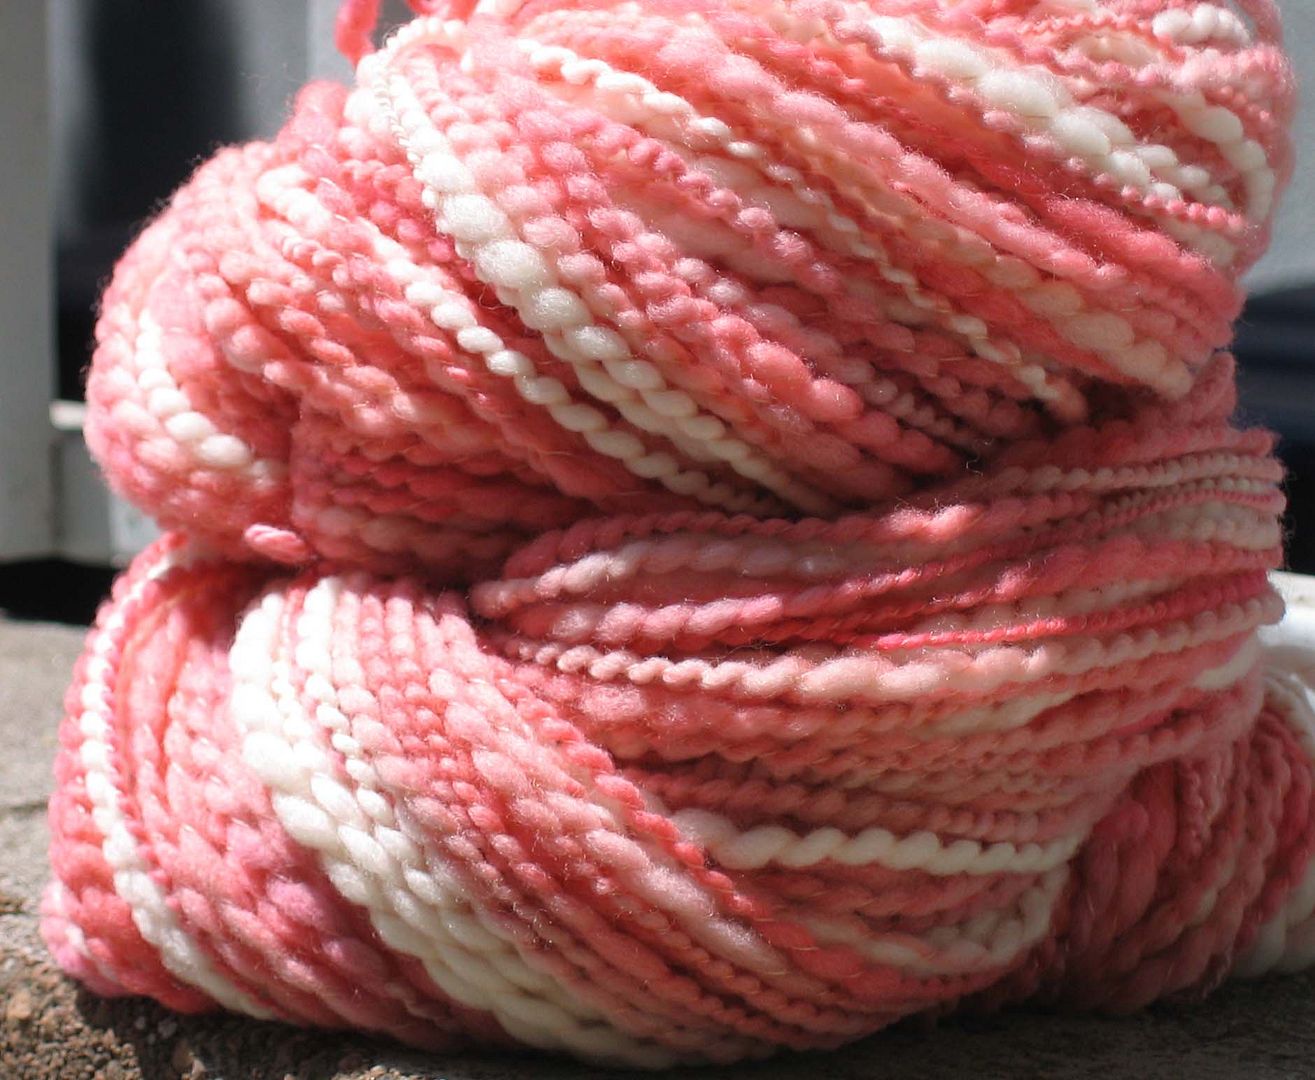
Homespun chunky yarn dyed with Kool-aid strawberry and pink lemonade:
When the dying is over, remove the plastic wrap, being careful not to burn yourself. There will be a lot of steam coming out and it gets very hot. Let the bowls of yarn cool until you can handle them. Using tongs, lift the yarn and pour out the water in the bowls. If you aren’t sure that the dye has set, you’ll want to rinse your yarn. The way to do this is to fill a bowl of water the same temperature as the yarn. Good luck with this, I can’t match temperatures unless the yarn is cool. I wait until the yarn is cool and basically dry before rinsing to be safe. Some people add a bit of soap to the rinse but I don’t. Gently wring out the yarn and roll around in a towel to dry. Hang yarn on a clothes hanger and put over your shower head to dry.
12 comments:
Spectacular!!! Thanks so much! Fantastic tute and pics!
Keep on experimenting in the free world! Those yarns rock!! :)
This needs to be published! It is so detailed, easy to understand, picturesque, and just plain good!! Everytime I go to Border's Knitting section, I expect to see a book by you there! This is an unbiased remark and you know from soccer days, I can be unbiased!
Keep on dyeing fiber in the free world! I love your Kool-Aid colorways, though I would like to see what you do with the greens and blues, and grape (which yields both purple and blue). However, I feel compelled to add my two cents. I find that I get better results if I dye my handspun BEFORE I ply it. This results in less color puddling in the eventual knitted project. Also, Kool Aid works very well on Crochet Nylon, giving intense, saturated colors that make bitchin' purses, "string" bags, cell phone holders and laptop cases. Anyone who likes Kool Aid or Wilton Cake dyes should try Easter egg dyes. You have to remember to use vinegar or lemon juice with these, however. The day after Easter, I buy up the marked-down dye in insane quantities to dye fiber with all year long. It rounds out the Kool Aid palette nicely. And plain old food coloring works very well, too, either on its own (with vinegar or lemon juice), or added to Kool Aid or Easter Egg dyes to tweak the colors in new directions. Knitters and crocheters who don't spin (yet!) can use these dyes on white, natural, or light-colored purchased animal-fiber yarn and get fantastic results, especially on superwashed wool, which soaks up the color in a flash. I buy sale yarn for this purpose now and then.
Thank you so much for this tutorial....I did a few test batches today, and your directions were clear and so right on! You definitely make kool aid fun!
Wow - you have given me faith to try Kool Aid again (not a bad experience, just a lot of work and a looooot of plastic wrap!)
Your spinning is beautiful.
Regarding this instruction for multiple colors... "Arrange the yarn so that it is in a spiral, as close to one layer as possible. Avoid bunching and tangling. Pour the colors gently over the yarn and let them pool in the bottom of the bowl." Am I understanding this right.....you put the yarn in a spiral and then you just pour multiple colors of dye over the yarn at the same time? Seems like the colors would mix and make a brown mess?
hey anonymous,
It works for me. It may not work for everyone.
you might get a brown mess if you're careless about your technique, if you use too much dye, and if you mix opposite colors like red/green, yellow/purple, or blue/orange.
If you're careful, you won't have a brown mess.
Don't pour too many colors on top of eachother. Don't use too much dye to pool on the bottom.
How do you get the beaded yarn look when dying roving? I love the way that spun yarn looks. Do you dye it to twist with two colours, or does it just do that as you spin?
Hey Catherine,
The beaded yarn was done this way: dye a lot of roving with a few different colors. Spin the yarn onto two bobbins, then ply together loosely. String beads onto sturdy thread and ply with yarn once more.
Hope this makes sense!
The colors just happen because the roving had different colors and when you ply the colors line up in different ways :-)
Beautiful pictures and excellent, clear! I will be posting a link to your blog from my Facebook felting page-- Felting Away! Thanks!
Thanks for your inspiring tutorials! I have a question about the handpainting. After you wrap the painted yarn in plastic and put it in a bowl, do you leave it wrapped during the cooking process? Do you worry it will dry out? Thanks again!
Post a Comment